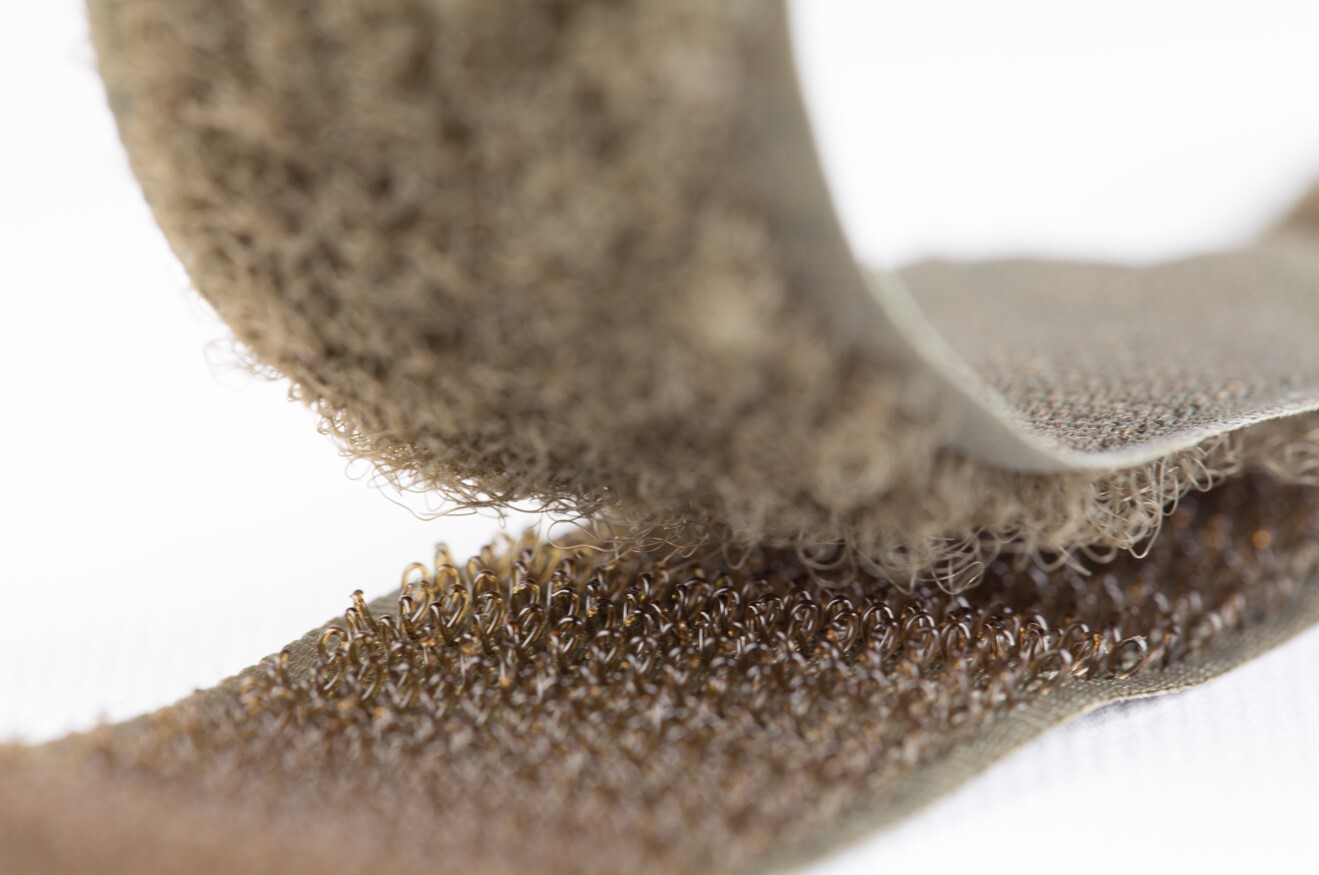
Reclosable Fastener: a perfect solution for all loose situations

Nowadays fasteners are essential parts of everyday life. The products rapidly gained popularity thanks to their practicality and simplicity. Depending on the types, the use may vastly differ. Fasteners are used as essential tools in many fields from textile to industrial application. Let's see what you need to know about the product!

The invention of the reclosable fastener

The inventor of the reclosable fastener, Georges de Mestral, was inspired by nature and especially by the thistle. In 1941, after a hunting trip, he was picking thistles stuck in his trousers and his dog's fur. He observed how these plants could stick so strongly and cling to the fabric with so many hooks. In 1951, after refining the idea he finally patented his invention which he called the ‘Velcron’. Over the past 70 years, the concept of reclosable fastener has not changed. On the other hand, technology, materials, and the fields of applications have expanded considerably.

 Reclosable Fastener

Where should fasteners be used?

The question may arise in which cases a fastener is the best choice. In general, a fastener is recommended when it is important to fix two elements firmly while keeping easy removal optional. Typical examples could be various panels, advertising tools, information boards, instrumental panel elements and so on. It is important to emphasize that fasteners are very durable and weatherproof so they can be used outdoors too.

Which types of fasteners exist?

Fasteners can be categorised in several ways. The main differential characteristics are the ways of attachment to the surface. The first group are the so-called sewable fasteners which can be easily fixed with a needle and thread. These are mostly used for textiles.

Another major group of fasteners are the self-adhesive ones. In this case, the backs of the two strips are self-adhesive as they are coated with adhesive material which allows them to be attached to many surfaces. They are mostly used when the substrate is a non-sewable surface such as wood or plastic.

What is a self-adhesive fastener?

The main difference between a self-adhesive fastener and a plain fastener is the strong glue strip. It is easier to apply the self-adhesive fastener because the strip and the other side do not require sewing. This way, the product provides a dismountable and lockable, high-strength fastening method that makes it ideal for industrial applications.

The 3M™ Dual Lock™ industrial fasteners, for example, provide twelve times stronger adhesion than any classic loop-clamp fastening method due to the mushroom-shaped spikes that interlock the two parts of the fastener. In a previous post we described this technology.

The advantages of self-adhesive fastener

The self-adhesive fastener has several advantages compared to other fastening methods. Let's have a look at them!

 Reclosable Fastener

No-drill bonding

Fasteners are equipped with mechanical fixing mechanisms. A big advantage of them is that there is no need to drill or damage the surfaces. Because of their nature, fasteners can bond surfaces together without any screw. Similarly, a self-adhesive fastener can also be of great service when the classic fastener cannot be sewn.

Easy installation

Applying the self-adhesive fasteners is child's play. No tools or complex measurements are needed, just the removal of the protective film on the back of the self-adhesive fasteners.

A solution for every need

It matters what kind of surfaces you want to bond and how strong adhesion you need. That's why there are many types of self-adhesive fasteners. For example, some are transparent, some have a rubber-based adhesive back, and some have a low-profile size.

Discreet design

Self-adhesive fasteners can be discreetly used to bond surfaces. There is no trace of the fastening until dismantle. Not to mention, if the fastener is transparent, then the colour of the underlying surface is also visible, making the fastener less noticeable.

Self-adhesive industrial fasteners provide strong bonding. They are an excellent choice to attach different types of surfaces, especially when it is important to have a bonding that is quick to create, easy to dismantle and yet still strong. Check out what Flanker has to offer!

  • Hits: 1048

Abrasive discs for disc sander: what, when and how?

The disc sander, or flex, is a real all-rounder in the workshop. It can be equipped with a wide range of accessories which makes it useful for many tasks such as sanding, cutting or polishing. There are several versions of abrasive discs. Let's see which one to use when!

How should you choose a disc sander?

There was a time in Hungary when almost all disc sanders were made by the German company ‘Flex’. Thanks to that, this type of grinder is most commonly referred to as a ”flex” in general. The disc sander can be translated as ‘corner sander’ in Hungarian, however, it is not suitable for grinding corners. It is called so because it is the opposite of a straight-shaft grinder. While in a straight-shaft grinder the motor and the disc are on the same horizontal, in a disc sander the motor and the disc are at right angles. Today there are several types of products, so it's a good idea to get further information before purchasing.

The higher the speed of the device, the stronger it is. This strength is often essential, but sometimes, for example, when it comes to polishing, it can be too much and damage the surfaces. Should you often encounter such cases then opt for a grinder with an adjustable speed. They are a bit more expensive, but if the high speed could damage the machine or the material, there is no other choice.

Abrasive discs for disc sander

Grinders are single-handed below 150 mm and double-handed above that. This is because the power of the latter is quite high so two hands are needed to hold them safely.

There are both wired and battery-powered grinders. It is understood that the battery-powered versions allow for much more freedom and these products are easier and more comfortable to move around with. However, you should be aware that with frequent use, the batteries will lose capacity over time, so they will run for a shorter and shorter time.

With grinders, particular attention must be paid to safety. Therefore, it is advisable to choose a model with a soft start. The reason for this is that when you switch the device on, it only gradually increases the speed which is safer and more efficient in terms of power consumption. Some models also have special sensors so that should the machine overload or overheat, it will automatically switch off and can only be restarted when it has cooled down.

Finally, as far as different types are concerned, there are also grinders specifically designed for DIY and also professional use. These can differ in price and performance because it does matter whether you use a disc sander once every six months or several times a day.

Abrasive discs for the disc sander

You can start the planned work when you attached the disc to the machine. Discs for disc sanders have different types depending on whether you want to use them for various surfaces such as wood, metal, plastic, ceramic, iron, paving stone, concrete or simply for polishing.

 Abrasive discs for disc sander

The basic accessories for the grinder are the cutting disc and the sander disc. Their diameter and material vary according to the surface but their thickness may also vary within this range. While the cutting disc is 2.5-3 mm, the sander disc is 4-6 mm thick. They are usually colour-coded to indicate what they are for: blue for cutting metal, red for grinding metal and green for grinding stone. If you are grinding with a plastic disc, you ought to use sander discs or fibre sheets of different grit sizes which can be attached with a gum disc or fastener. This is the abrasive disc that is also used in different colours: red is suitable for sanding metal and wood, and grey is for sanding stone.

Today, there are also so-called diamond-grinding discs that take the cutting process to a new level as they are very powerful, have a high capacity, and can even cut stone building materials.

Usually, the discs also have numbers and sometimes warning labels on them. These provide information on the outside diameter of the disc, the thickness, the diameter of the centre hole and the speed of rotation.

 How to use the disc sander

Using a disc sander is not difficult but there are some basic rules to follow. For example, it's important not to remove the protective cover on the machine which is fitted for safety reasons: it protects the user during cutting and other dangerous operations. It is also important to hold the disc sander with two hands and fix the material/workpiece with a clamp. Moreover, if the machine is used as a saw, it is essential to wear safety goggles.

Mistakes can arise, especially when the machine is used as a saw (i.e. cutting) and full force is applied. However, this is not the best way as it can damage the material and the disc too. It is better to let the machine do its work under its weight and not to force anything.

 Accessories for disc sanders

There are now several accessories available for disc sanders. Once the grinding disc is removed, the new adapter can be easily attached. Some accessories can be used to turn the grinder into a circular cutter, a hole drill or even a handsaw.

  • Hits: 1098

Why is an anti-glare screen cover useful?

Many would reason that the biggest challenge in the IT world is security. According to relevant surveys, 95% of all IT incidents are caused by human error. This is exemplified by the fact that the weak link in IT security, including data protection, is the human being. Many people don't realise how much risk is involved just by working with company data in a public place or by sending virtual letters. An anti-glare film on a screen can limit the risk of malicious attacks, protecting your data from prying eyes. Let's see how it works!

Remote working is becoming increasingly popular in our country too. It is often associated with home office, but with remote working, it is not at all certain that an employee is working from home. It could be anywhere; in a coffee shop, a community office, or even sitting on a train while working online.

anti glare screen cover

One might think that all you need for safe and smooth remote working is a notebook. Technically, this is true, but there are a few things you need to be aware of to ensure that security conditions are met. For example, you need to password-protect your computer, connect to a secure network, and make sure that no one can access your laptop. A solution to the latter problem is to put a computer privacy film or cover on the screen.

Glare protection with a unique cover film

An anti-glare film is placed on the screen to prevent anyone from reading what you are looking at or typing. The idea and the functioning are very simple. It's a filter made up of thin sheets. These sheets give you a full view from the front but prevent you from reading the text on the screen from the side. The angle within which the full content of the screen can be seen is approximately 60 degrees. Outside this range, the anti-glare cover blocks the view.

The anti-glare film is available in several sizes. There are some specifically sized for Windows notebooks and others for MacBooks. Such privacy filters can now be easily placed on the screen of a smartphone.

The anti-glare cover sticks to the screen with the help of a tiny magnet. For Windows laptops, two small magnets are attached to the two edges of the screen, to which the privacy film itself will fit. For the MacBook, it's even simpler than that, thanks to the fact that these laptops have a magnetic strip on the screen by default.

What are the benefits of a screen protector?

Using anti-glare film is very simple. You don't have to spend a lot of time putting them on, just a few precise moves. Similarly, removing the privacy filter is easy. Thanks to the thin nature of the product, there is no problem closing the laptops.

These extra layers not only prevent visual data theft but also protect the screen from dust and scratches. The film also protects the eyes by reducing blue light (by around 30%) and eliminating reflection.

anti glare screen cover

When should I use anti-glare screen covers?

The answer is simple: anytime when you are not at home or in the office, or when you are around people who have nothing to do with your personal and company data. Let's look at some examples!

In a public place, such as a café

Crowded places are very risky when it comes to data protection. While many people like to work from cafés, you must be aware that anyone can look at a monitor and find the information they shouldn't.

While travelling

Travelling is a situation where you are limited in what you can do. Whether on a train, bus, or plane, you must sit in a specific place and preferably do something that does not disturb other passengers. Many people like to work while travelling, as it allows them to kill two birds with one stone: they can get from A to B and still get on with their tasks.

In these cases, we are sitting close to another passenger who can gain valuable information with a single glance, if we don't think about privacy.

In an open office

Open offices are becoming increasingly popular, even though we now know that in many ways they are not advantageous, especially when it comes to data or privacy protection. If someone is not using a privacy screen, or if the workplace is not fully protected, strangers sitting behind or around can easily observe the screen.

Sitting next to colleagues does not mean you should avoid using anti-glare technologies. Think, for example, how uncomfortable it can be for the person behind HR to look at the pay scales of colleagues in a company with an organisational culture where pay is a taboo subject.

When handling sensitive data

Protection should be ensured in all cases where personal data, possibly sensitive data, is being handled. Information on personal health conditions, personal background, or financial status are all considered highly sensitive data. In these cases, it is a duty to ensure data privacy.

A privacy filter can therefore help to prevent situations where sensitive and personal data could be in the possession of unauthorised people. Be careful and put a privacy screen on your screen today!


  • Hits: 1072

3M Entrance Matting: for clean interiors

Various types of carpets or mats, such as the 3M Drop Down Mat, are suitable for preventing dirt from entering the interiors. The entrance of any location is the first critical area for dirt, as this is the point from where the most contamination can enter the rooms. Only by taking the necessary preventive measures, one can reduce the volume of dirt entering by more than 40%. This value can reach up to 80% with the help of 3M products.

The dirt trap systems

Dirt traps are made up of a series of entrance mats with different functions. A complex system consists of three phases, the first of which catches large solid contaminants such as gravel and mud. The second removes the smaller dirt that remains on the surface, such as dust and sand, and the third phase is used to absorb moisture and water.

On this basis, the zonal approach distinguishes between three types of entrance mats: outdoor, intermediate zone, and indoor mats. These zones can be arranged in many variations, and it is even possible that one or two-phase are missing entirely.

3M entrance matting

What are the criteria to choose from?

We have put together several considerations to think about before making your choice, to ensure that the right entrance mat is placed in front of/near the door.

Specificities of the paths leading to your home

The cleanliness of a room and the difficulty of maintaining it is influenced by several things. For example, the routes along which people walk, the size of these routes or paths, the volume and nature of the traffic. These can be used to determine what kind of pollution control mat to choose.

Outdoor or indoor

A crucial question is whether you want to install the entrance mat outdoors or indoors. For outdoor mats, you need to consider climatic specificities, such as the snow, and the effects of rainfall and UV radiation. Outdoor entrance mats are designed to remove dirt from the soles and sides of shoes, thus preventing solid dirt from settling on the floor surface.

The purpose of indoor dirt traps, on the other hand, is mainly to absorb moisture and, of course, to remove any remaining dirt from the surface of the shoe.

The material of the entrance mat

The material of the mat should be chosen according to whether it will be used outdoors or indoors.

Rubber-based mats are most often placed outdoors, made from a strong and durable material, thus providing effective work and are easy to clean. They're available in both roll and modular versions, so it's easy to have a textile version indoors.

3M entrance matting

Textile entrance mats are very common, thanks to the fact that they are available in a variety of designs: some are made of rubber, some are plastic, the fibre thickness can be longer or shorter, and the fibre composition can even differ.

The third main material used for entrance mats is aluminium. They are very robust and modern and elegant, which is why they are the preferred choice for office buildings. They can be placed anywhere, in any shape and can be easily adapted to the environment.

Advantages of the 3M entrance or drop down mats

The 3M drop down mat has many advantages over other types.

·        There are many versions available, offering optimal solutions for various unique local needs. For example, the Nomad is recommended for low traffic (up to 500 people/day) indoor cleaning, the Nomad Terra is for picking up special dirt outdoors and indoors, and there are also tangled fibre and self-adhesive versions available.

·        Depending on the type, the drop down mats are very durable. Even the thinner and less resistant models will last for a long time.

·        With 3M, quality is guaranteed.

·        Due to the aesthetic appearance, they add to the overall look, not detract from it. In certain situations, such as an office building or a hotel, this is an important consideration.

Keeping dirt, mud and moisture out is not only important for cleaning, floor protection and aesthetics, but also for safety considerations. Look at the solutions Flanker offers!


  • Hits: 959

Boat maintenance: from the keel to the sail

Boat maintenance in spring and autumn is an integral part of owning a watercraft. Some particularly enjoy spending a few extra stolen hours with their beloved boat, but some just like to get over the necessities. Regardless of the situation, the bottom line is that boat maintenance is a process that cannot be ignored, like UV, weather, salt and oxidation can leave a serious mark on our property. Let's take a look at what needs to be done to keep your vessel above the water through the next season!

From late autumn to spring, the biggest task, apart from making plans and setting goals, is to prepare the boat for the season. This can be done by yourself, by the marina as a service, or by a specialist workshop if the boat is still under warranty. Let's look at the most important items to check!

Boat maintenance

The rigging: the running and standing rigging

The heart and soul of a sailing boat is the rigging. Don't miss out on checking it. The running rigging is much easier to check, the standing rigging is more challenging. If you come across elements that are in worse than average condition, be sure to replace them, and if you're not sure, ask for professional help.

The sail: the snow-white windcatcher

Make sure the sail is intact! If you notice any tears or sewing errors, be sure to repair them! You can also do a lot to improve the condition of the sail when you are using it, for example by making sure it is not overstretched. And when you put it away for longer periods, it's a good idea to do so in a clean condition.

The engine: technical assistance

Safety is the number one priority and it is important to ensure that neither injury nor damage to property is the result of carelessness. That's why you should assess your skills and leave the repair to the professionals. Typical examples are electronics and engine repairs. Although they are tasks that require a specialist, it's worth having them checked every year.

The hull: the foundation of boat maintenance

Hull maintenance consists of three major stages: repair, washing and care. The first is an assessment of what damage needs to be repaired on the hull’s surface, all of which, even the smallest, need to be rectified. This is followed by cleaning, from the bottom of the boat to the floor, to the inner hulls. Last but not least, it is also important to ensure that in the future as little dirt as possible adheres to the surfaces and that the various elements, such as the sun and water, leave as few traces as possible.

Repairing damage

It is worth taking the time to repair even the smallest problems to avoid major damages. Damage to plastic hulls should be cleaned and polished, while for steel hulls the paint is the key factor, as the painted layer protects the boat from external influences. The maintenance of wooden hulls requires particular expertise, as they are the most exposed to the elements.

Surface cleaning

Surface cleaning can be done in several ways, using different types of detergents,shampoos, clean water and polishing sponges. Fine grit polishing can also be a good solution, as these polishes only remove the dirt that sticks to the surface, but do not cause deeper damage.

The boat maintenance

Algaecide and waxing

After cleaning, a protective layer of varnish or wax is applied to the surface. It is important to note here that the wax used in the automotive industry is not the same as that used for boats. In boats, waxing can be applied in a single coat up to 600 microns thick, whereas in cars, 6-8 coats can achieve 100 microns. In other words, boat wax is much more robust, which is understandable as it has to withstand much higher UV radiation.

Mould and algae growth is a particular problem in terms of deterioration. This is most easily controlled by the use of various anti-algaecides. All you need to do is coat the surface with an anti-algae layer!

The most important thing when it comes to boat maintenance is to only undertake work that you are 100% sure of! If you feel even a little unsure, be sure to ask the professionals for help, this will save you a lot of annoyance and possibly financial damage. Once you have done all the maintenance work, the last thing you need to do is to take care of the obligatory equipment for the sailing boat, such as the lifebelt, tools and first aid equipment! So you're ready for the season to start!


  • Hits: 218
FaLang translation system by Faboba