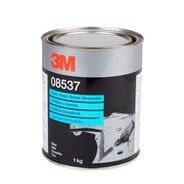
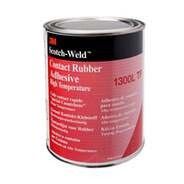
Superglue for a secure bond

Superglue is part of our everyday life. When something breaks or cracks, we automatically reach for it, which is understandable, because it's a very practical solution that quickly fixes the problem. In this article, we'll show you what superglue is, how it works, and how to use it.

What is superglue?

Superglue is a type of glue that utilises chemical principles. It polymerises and forms a stable bond between the surfaces, thanks to the moisture that reaches the material.

This type of adhesive can be used to bond materials such as leather, wood, rubber, and plastic. For example, there are superglues specifically for plastics and rubber, but there are also general-purpose solutions. They can be used well on small surfaces, but also larger ones.

superglue

How was superglue invented?

Superglue was discovered as a by-product of the Second World War. In 1942, Dr Harry Coover and his team of researchers were trying to produce a new type of targeting equipment, when they created superglue by accident. It was almost 10 years later when Coover, now a researcher at Kodak Research Labs working with Fred Joyner, discovered the compound again. It finally hit the markets in 1958, changing repair practices with this state-of-the-art solution.
How does superglue work?

If you look at it from a chemical point of view, you can say that superglue is an acrylic resin. Its mechanism is based on a chemical reaction: polymerisation is triggered by hydroxide ions in the ambient moisture. This process is called anionic polymerisation.

Thanks to the fact that the cyanoacrylate monomers are linked by water and then the chains are linked as long as the polymer chain will allow, a durable and strong plastic mesh can be created. This plastic mesh is responsible for the extremely strong bond.

Types of superglue

We can categorise superglues according to various criteria. These are presented below!

The consistency

Not all superglues have the same consistency. Some superglues are very dilute and flow easily, some that are relatively thick, and some that are very thick. The thicker the adhesive, the more suitable it is for bonding vertical or near-vertical surfaces. If such a thick adhesive is used, it is always indicated on the packaging. Also, be prepared for these gel-like adhesives to be much harder to get out of the tube.

Medium-flow or relatively thick superglues are the most common, they are easy to work with but don't flow away quickly. Dilute versions can flow into small gaps, but are best used only on horizontal surfaces and may run on vertical surfaces. If you're dealing with a very runny glue, you may want to use a needle-nose dispenser to make sure you don't have any problems.

Filling the gap

One important property of superglues is their gap-filling ability. Typically this ranges between 0.15 and 0.25 mm. However, there are also special fillers that can be used to extend the gap-filling capacity of the instant adhesive. In this case, the filler must first be pressed into the gap, which is too large, and then the superglue, which then holds the entire filling together and converts it into a very stable bond.

Heat resistance

Superglues can withstand high temperatures up to a certain level. Generally speaking, they can withstand temperatures of 60-80 degrees Celsius. Of course, there are also special versions available. Some superglues can form the same bond between -55 and +90 degrees Celsius.
The bond

In this article, we mostly mention cyanoacrylate-based adhesives that bond when exposed to moisture. This bond is formed in a single minute and takes up to 60 minutes to achieve full effect. There are also instant adhesives that do not set as a result of moisture but as a result of some other effect, such as UV or visible light.

Application of the superglue

Superglue is a popular choice. It is very versatile: it can be used to repair and glue broken objects, but it is also used in forensic medicine for restoring fingerprints, and surgeons use special versions to seal wounds.

superglue

It has the characteristic of sticking to the skin very easily because the moisture on the surface of the skin triggers the bonding process in a matter of moments. It should be used with great care and attention, as it can, for example, clump the eyelids and eyelashes if it gets in the eyes. It is also recommended to ventilate during use, as the vapour that escapes from the material can irritate the nasal mucosa, the surface of the throat, the lungs, and the eyes.

Once the superglue has been carefully applied to the surface to be glued over a small area, the material begins to set, reaches the thickness of the layer, and forms a hard, brittle bond. This also means that if you are dealing with textiles or flexible materials, it is not enough to use a conventional superglue, you need a special solution. In some cases, it may also be necessary to use a primer. This step should not be skipped, especially where low surface energy and difficult-to-bond materials are involved. For example, polypropylene, polyethylene, and PTFE. The primer should be applied to these surfaces and will dry quickly, preparing the ground for the adhesive.

It is important to note that the superglue will also set in the tube over time due to humidity, so it is best to store it at a temperature of 2-8 degrees Celsius. However, many people don't follow this, so if you use it infrequently, choose a smaller container. During storage, care should also be taken to ensure that neither the cap nor the tube is damaged.

Flanker offers a professional solution for all situations where raw materials, tools, and industrial supplies are needed. Have a look at our webcatalogue!

  • Hits: 390

Using the sander

The sander is a very versatile tool, which is widely used in various industries, but can also be utilised at home, whether for renovation, maintenance, construction, or DIY. So it's a good idea to be aware of the types and uses of a grinder. In this blog post, we have summarised the most important things to know.

Types of sanders

A sander can be used for a variety of tasks, as it can be useful for cleaning, smoothing, and removing the top layer of any surface. There are different types of sanders, depending on the size of the surface, the material, and the purpose of the operation.

using the sander

There are two main types of hand-held sanders, based on the way they work: surface and belt sanders. Disc sanders, also known as circular/square sanders, grind in a defined shape. The sanding wheel is fixed using a screw or Velcro, which is used to carry out the grinding. The other major category is the belt sander, which is a belt sander, where the abrasive belt is placed in a belt-like manner and moved around.

Let's take a look at what types exist within the two main categories.

Belt sander

A belt sander is an excellent tool to clean larger surfaces, for example, to get rid of thicker layers of paint or to remove large uneven areas. However, it is not suitable for more delicate work, such as sanding corners or edges.

Vibrating sander

The so-called vibrating sander makes a vibrating movement. The base is square and, like the angle sander, it can be used to remove layers of larger surfaces. The difference between the two is that the vibrating sander removes the top layer more slowly, so it is mostly used when only the surface layers need to be removed.

Random orbital sander

A random orbital sander performs a rotary motion. Some types vibrate sideways and those that rotate around the axis. The grinding surface can be either disc or square, which allows the removal of coatings from larger surfaces. What is different is that it can handle curved and round shapes.

Multisander

The multisander is a hybrid type of sander for middle-sized surfaces. They have a wider base but end in a point, which makes them suitable for sanding hard-to-reach places corners, and edges

Delta sander

The head of a delta sander, as the name suggests, is triangular, which can be used for smaller jobs, such as sanding edges and corners. As it is designed for fine work, it has a small grinding surface, so avoid using this type in large areas.

What other considerations should you think about when choosing a sander?

One of the most important considerations when choosing the right sander is what material you want to sand and what grit size disc is recommended for that material. Depending on the grit size, it is fortunate that you can vary the vibration rate and speed.

It is advisable to choose a machine that you can hold comfortably, has a good ergonomic design, and has a function that sucks away dust. Depending on your needs, you can choose between corded and cordless sanders, in the former case make sure that the cable management is good.

Using the sander

The two most important factors when sanding are speed and fineness. The speed of the tool's motor can be controlled on most machines: on an oscillating grinder, you can change the vibration rate, on a belt grinder the speed of the belt.

Grinding is a process, which means that you start with the coarser grinder first and slowly work your way up to the finer one. Use a lower speed for the coarser sandpaper and a higher speed for the finer. Take particular care not to burn the wood surface due to the high speed!

using the sander

It is important to know that the value on the sandpaper, usually marked P, indicates the fineness of the grain. It means the number of grains per unit area. In other words, the higher the number on the paper, the finer the sanding. For metal and wood sanding, the coarser jobs are done with 40 and 60 grit paper, the medium with 80-100, and the higher numbers will finish the surface.

If you are using a random orbital sander, buy paper that is Velcroed and perforated, which makes it much easier. If you're doing carpentry work, practicality dictates that you line the tape underneath, so lined tape avoids the streaks left by the sander showing through on the surface. Alternatively, if you are sanding the outer curves, try using clamps to secure the machine to the edge of the workbench by turning it sideways.

Click here to browse Flanker's range of sanders and accessories!

  • Hits: 391

Glass cloth electrical tape: reinforcement of gaps made easy

Whether it's a building or renovation project, in addition to the main raw materials, several seemingly minor elements are essential to a good result. In this article, we will introduce one such small but even more important material, the glass cloth electrical tape, which is essential for gluing small gaps and holes when joining plasterboard sheets. Let's see what you need to know about it!

What is a glass cloth electrical tape?

Glass cloth electrical tape is used to reinforce the joints between plasterboard panels and to reinforce holes and cracks. It is a very effective solution for sealing joints and gaps. It has a very high tensile strength, which gives it a long life and a secure hold, and it adheres well even on dusty surfaces.

Glass cloth electrical tape

Such tapes can be self-adhesive, made of glass fibre, or even paper.

Glass cloth electrical tape, as the name suggests, is made of glass tape, which is very strong and durable. It is resistant to chemical attack, extreme temperatures, and corrosion. In most cases, it is attached with some other material, such as glue or resin, to further increase its durability.

Its uses can be very diverse. It is mainly used in the construction industry to reinforce plasters, and plasterboarding and to repair cracks. It is also used in the construction of cars, boats, and aircraft, to make vehicles even more resistant. High strength can also be a particularly important aspect in sports equipment, so it is not surprising that it is also used to reinforce bicycles, fishing rods, and skateboards, for example, and is also a popular material in various artistic sectors, such as sculpture.

A wide range of glass cloth electrical tape is available. They come in different thicknesses and sizes depending on where and in what situation they are used.

Use of glass cloth electrical tape

The use of glass cloth electrical tape requires some practice, but there is no need to be intimidated by it. The adhesive material should be applied and then the tape can be easily smoothed in while it is still fresh and has not started to dry. Once this is done, wait for the surface to dry. Once dry, the glued surface is sanded overusing a special sanding grid. This should be done with particular care as it may damage the bonding agent.

The advantages of glass cloth electrical tape

With so many advantages, it's no wonder that glass cloth electrical tape is the preferred choice for professionals. Let's get to know these benefits!

Good adhesion

The ease with which the tape adheres to the adhesive is very important for efficiency. Thanks to its special structure, this type of tape has a very good adhesion and is easy to work with.

Glass cloth electrical tape

Protection against cracks

Due to the nature of the material, cracks can easily develop, and it is therefore important to use as many means as possible to prevent them. If you use glass cloth electrical tape in combination with adhesive materials, you can prevent the formation of gaps and cracks.

Versatile application

Glass cloth electrical tape is popular because of its versatility. In addition to the uses already mentioned above, it can also be an excellent choice for special situations, such as fire barriers.

Flanker has been present in the domestic market for more than 20 years. It offers professional solutions for the printing and paper industry, packaging, automotive, electronics, and furniture manufacturing. We provide our customers with high-quality products that keep them coming back for more.

Click and browse our website!

  • Hits: 331

Case sealer: keep all your goods safe

Products are typically transported in boxes, but it matters how the box shipped is sealed. If this is not done professionally enough, the goods can be damaged during transport, which is both inconvenient for the customer and financially damaging for the company. The ideal case sealer automates this key operation. Let's see how!

Packaging technology is a rather colourful field that has undergone huge changes over the last decades. With the growth of online shops and the rise of online shopping, speed is becoming increasingly important, but fortunately not at the expense of security.

case sealer

Thanks to innovation, packaging can now be made even more efficient with the help of complex systems. Boxes are assembled by the box erecting machine, so workers only must concentrate on filling them, if not automatically. Once the goods are in the box, it is sealed by the case sealer machine and the finished packages can be sent to the warehouse on a conveyor belt.

What is a case sealer?

During the sealing process, the workers insert the open box into the sealer that automatically seals it and loads the next box. Thanks to the automated sealing process, the quality of the packaging is guaranteed. Case sealers are durable and low-maintenance solutions when it comes to packaging. Flanker offers a wide range of case sealers, such as the 3M-MaticTM 7000A 3PH 380/415V case sealer ACCUGLIDE 2+2IN, or the 3M-Matic™ 8000A 1PH 220/240V case sealer ACCUGLIDE 2+2IN.

The advantage of a case sealer is that it is flexible in adapting to the size of the boxes, and automatically detects the parameters of the box and adjusts based on these parameters.

Sealing is possible with several types of case sealers. There are manual adhesive tape applicators, semi-automatic bottom-up sealing machines with manual or automatic adjustment, semi-automatic box erecting and filling stations, and automatic box erecting machines with bottom-up adhesive case sealing.

Selecting the optimal tape is crucial during the process. There are many types to choose from, for example brown, transparent, paper, and of course different sizes. See what box sealing tapes are available from Flanker!

What aspects should you consider when choosing a case sealer?

Choosing the right case sealer is not a simple task. Let's look at the factors you should consider before making your decision.

  • What is the type of the box? What are its parameters? What is the material? Cardboard? Corrugated?
  • Are all boxes the same size or are the sizes different?
  • How is the box closed? Will the folding of the tabs be automatic? What width of the tape is needed, and will there be overlapping?
  • What capacity is required? What are the performance level requirements? How many boxes will need to be closed per day?
  • What will the box contain? How much load will the box sealing machine be subjected to?
  • What other requirements are there? Will it fit into an existing system?

In which cases is it appropriate to use a case sealer?

There are cases when a case sealer can significantly facilitate and speed up the packaging process. For example, webshop operators, and manufacturers who need to package their products safely in the shortest possible time.

case sealer

What are the advantages of a case sealer?

The biggest advantage of case sealers is their speed and efficient operation. A semi-automatic machine can seal as many cans in 5 minutes as it can manually in 30 minutes. It logically follows that it increases packaging capacity significantly, by up to a third. Operation is simple and fast, just switch it on and it's ready to work. It helps to optimise the amount of adhesive tape used and thus reduces costs.

What does a professional, good case sealer look like?

The following requirements can be made of modern case sealers:

  • Practical: a case sealer is easily variable, can be built in both left and right-hand versions, and its modules are interchangeable.
  • Safe: the construction of a good quality machine is simple, with few components, which also means that it requires little maintenance and therefore minimum downtime. Its operation is safe in terms of both efficient production and operation.
  • Offers functional variability: modern case sealers can be easily expanded with other modules to meet your needs.

With the rise of online shopping, the issue of appropriate packaging is also gaining in importance. However, by using a quality case sealer, you can be sure that the parcel you send will arrive undamaged.

  • Hits: 369

Polyurethane adhesive

Polyurethane (PU) glue is a very versatile adhesive, making it a popular choice among our customers. What exactly is polyurethane adhesive, what types are there and when should it be used? Here are the most important things to know.

Polyurethane

Polyurethane is a generic term for materials that are held together by urethane, or carbamate bonds. This versatile polymer material can have different properties depending on the type of material, which makes it suitable for use in construction, furniture, and automotive applications. It is available in various forms, including coatings, foams, and adhesives. Let's find out what you need to know about polyurethane adhesive!

polyurethane adhesive

Polyurethane adhesive

Polyurethane adhesive is a synthetic, resin-based adhesive that hardens when it comes into contact with water. As soon as the adhesive is applied to the surface, it starts to expand and the excess can be easily removed with a knife. Achieving the final solid state, a permanent bond can take up to 1 hour, so the materials must be tightly pushed together.

This type of adhesive can be used at temperatures above +15 degrees Celsius. Should you try to use it colder than this, the adhesive's properties may change. It is worth knowing that polyurethane is antiseptic, which means that it prevents mold and fungi from growing.

Let's learn about the benefits of polyurethane adhesive!

It can be used to bond different materials

One of the huge advantages of this type of adhesive is that it can be used to bond different materials together. Whether it's wood, plastic, metal, or any other material, polyurethane adhesive provides a stable bond.

Waterproof and watertight

Although moisture is required for curing, once the adhesive has set, it is no longer damaged by water or precipitation. This is an extremely advantageous property, which allows it to be used outdoors and even as a gap-filling sealant.

Practical use

The characteristic of the adhesive is that it does not cure all at once, but takes about 20 minutes to harden. This is an advantage because, in this time interval, it is still possible to move the materials around and find the right position and setting. Overall, it takes 1 hour for the final bond to form, and this long bonding time should always be taken into account when applying the adhesive.

Gentle

The polyurethane adhesive does not damage the surface of the materials, does not leave marks, and does not bump up. This means that it can be used safely even when laying parquet or wooden floors. 

Weather resistant

Resistance is a very important property, and polyurethane adhesive is a leader in this respect. It is resistant to frost, air and heat, extreme temperatures, and substances such as petrol and oil.

What can it be used for?

As described above, polyurethane adhesive is a versatile option for bonding tasks.  It can be used to glue ceramics, stone slabs, marble, porcelain, and mosaics, and repair swimming pools, boats, and toys. It is suitable for fixing PVC edges, and panels on furniture or windows.

Used in the manufacture of sandwich panels, for fixing artificial grass and rubber mats. An excellent choice when different elements such as timber beams, plinth units, guttering, or plastic need to be joined together. It can also be used for furniture restoration, shoe repair, flooring, and car seals.

The characteristics of the adhesive

Polyurethane adhesive is composed of 10-15 elements, the ratio of which determines the final properties of the adhesive, such as viscosity, adhesion, and curing speed. Different colouring agents are used to give different colours to adhesives for different applications, e.g. amber and brown for wood adhesives, and black or grey for metal adhesives.

polyurethane adhesive

Types of polyurethane adhesive

There are two types of polyurethane adhesives: one-component and two-component. What do you need to know about them?

The one-component polyurethane adhesive

These adhesives typically form a flexible bond, adhering surfaces together with a resilient layer that resembles rubber. They are less harmful to health than other adhesives because they contain fewer harmful substances.

It has the advantage of being an environmentally friendly solution that absorbs vibrations, creating a flexible bond rather than a rigid one. The adhesives can be easily resealed and reused later. If they accidentally get on the skin, there is no need to worry, they can be easily removed.

These one-component adhesives are also commonly found in households, used for repairing shoes, and carving. Easy to use, all that is needed to start polymerisation is a little moisture provided by the air or the material to which it is applied.

The two-component polyurethane adhesive

This type of adhesive is made up of two components which, when they come together, start a chemical reaction and form a bond. The two components come in separate packages, so they must be mixed before use. Particular care must be taken to ensure that the correct proportions are used, as this is the only way to achieve a satisfactory result. The polymerisation is not triggered by the moisture but by the other component.

It is essential to be aware that the B component of two-component adhesives contains epoxy resin, which means that it can be harmful to health, for example by causing an allergic reaction.

It is a preferred adhesive for floor tiling, for example, as it can be used to correct minor substrate irregularities. It bonds quickly and creates a very strong adhesion. It is easy to work with and good value for money.

Using the adhesive

With a one-component adhesive, the material is ready to use, but with a two-component adhesive, you start by mixing the ingredients. It is a good idea to remove any dirt, dust, or grease from the material and then apply the adhesive in a thin layer. If you are working with paste, use a spatula to spread it.

The layer of glue mustn't be too thick, i.e. that it is applied thinly. If you are working with a porous surface, apply two coats, wait a few minutes after the first coat, and then apply the next coat.

For a certain period, about 20 minutes, the materials can still move, so when you have found the right fit, fix them. Once the joint is formed, trim off the excess with a knife.

Check out the Flanker range, where you can choose from a wide selection of adhesives!

  • Hits: 444

© All Rights Reserved – Flanker Plusz Kft. | Site by Meraki