The pneumatic disc sander

Pneumatic tools are very efficient due to their unique functioning. Pneumatic sanders can be used to remove surface defects and unevenness effectively. In this article, we've gathered all the relevant information that you need to know about these tools.

What are pneumatic tools?

Pneumatic tools are air-powered. What this means in practice is that they build up an air system to which you can connect various special tools, such as a chisel, drill, angle grinder, stapler, impact wrench, or even a nail gun.

The great advantage of such air-based systems is that they can be installed on the columns at a much lower cost, to which various tools can then be easily attached.

pneumatic disc sander

Pneumatic disc sanders

A pneumatic disc sander is a tool that is commonly used to reduce and smooth the surface of various types of materials. The principle of operation is that the machine uses air pressure to generate the energy by which the grinding head rotates, causing the abrasive cloth, sanding disc, or sandpaper to perform a grinding or sanding motion.

These pneumatic sanders help to perform various sanding operations efficiently and effectively. Their use is advantageous as they are powerful and reliable thanks to the pneumatic power source.

Types of pneumatic sanders

Orbital sanders

Orbital grinders are very versatile tools, suitable for grinding and polishing surfaces of wood, metal, and other materials. Thanks to the rotary movement, smooth sanding can be achieved, whether it is for more vigorous or finer sanding.

Belt sanders

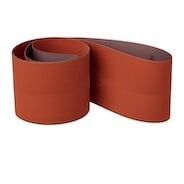
Belt sanders are longitudinal sanders, suitable for demanding and uniform sanding of larger workpiece surfaces. The performance of the machines and the quality of the sanding are determined by the grain size of the abrasive used.

Disc senders for covering angles

These special types of sanders can be used for a variety of applications. They are generally used for grinding and cutting surfaces of materials. Their compact, practical design and the different sizes of their discs allow them to handle almost any type of material.

Vibratory sanders

Vibratory sanders perform an irregular rotary motion, making them ideal for fine grinding of large surfaces. They are also used for grinding edges and corners. Their compact and lightweight design makes them convenient to use and ideal for places where access is limited.

Die grinders

Die grinders or sanders have different sizes and types of attachments, which allow the use of different grinding discs or cutting discs. The grinder can be used for grinding, smoothing, or cutting surfaces of metals, wood, or other materials. Pneumatic die grinders are widely used in various industries and trades, such as automotive, woodworking, engineering, and construction. In addition, the ergonomic design and light weight allow working for longer periods without fatigue.

pneumatic disc sander

Benefits of pneumatic sanders

Safety

In most cases, sanding tools are used in the work area, in the workshop, where dust can collect, liquids can spill or even conductive metals can be in the immediate environment. These are all sources of danger, especially when working with power tools. With a pneumatic sander, however, there is no need to worry about damaging the cord or accidentally cutting it, and the equipment itself does not pose any electrical hazard to the user.

Compact design

Pneumatic tools, including grinders, are typically preferred because they are compact and easy to use. They are strong, yet lightweight, thanks to the aluminum frame that houses a durable steel pneumatic motor and a composite handle for added comfort.

It is therefore much lighter, easier, and faster to work with, making the work much more efficient. For comparison, while an electric sander weighs just over 3kg and has a power output of 710W, a pneumatic sander weighs just under 2kg and has a power output of 1700W.

Efficiency

The main indicator of a sander is its material removal capacity, i.e. the time it takes to remove a given amount of material to be sanded. It is generally true for sanders that the best performance is achieved at a given power. Modern machines have an adjustable speed, so when you increase the speed, the airflow, the speed, and, of course, the speed of the abrasive increases.

Durability

Pneumatic grinders are very robust, they can withstand cutting, grinding, deburring, weld preparation, seam removal, and grinding. Electric grinders have several limitations, such as the fact that they cannot be used in humid environments and are significantly exposed to the negative effects of dust and abrasive particles in the air. Pneumatic devices, on the other hand, are more robust, can be used in humid environments and dust does not affect the engine. This makes their use more advantageous in foundries where extreme temperatures are encountered, in drilling rigs where water, salt, and cold are a challenge, and in windmill blade manufacturing where composite particles are a threat.

Trustworthiness

Pneumatic grinders are characterised by their tremendous durability, longevity, and reliability. Their simple design also means they are easy to service and maintain. Generally speaking, maintenance is required after 60-120 hours of operation, and the carbon brushes should be replaced at the very least. In the case of professional or industrial machines, the carbon brush should be replaced even less frequently, every 200 hours in the former case and every 2000 hours in the latter. With less servicing, the machine will be up and running for a shorter period, making it more cost-effective to operate.

Flanker's core values are reliability, cooperation, and dynamism. This is the spirit in which we work every day and strive to serve our customers with the highest possible quality. We have been in the market for more than 20 years, providing professional and complex solutions to industry players. Have a look around our web catalogue!

  • Hits: 496

Cutting disc for flex: the most important things to know

Flex is a commonly used tool in construction and other industries, also known as an angle grinder. It is a small electric machine to which various cutting discs and grinding wheels can be attached. It is ideal for cutting, grinding, sanding, and cleaning various materials. Flex has no problem functioning when facing sheet metal, metal tubes, or metal bars. One of the most important parts of this nifty little machine is the cutting disc, which allows you to cut and machine as desired. In this article, we'll briefly summarise what you need to know about the angle grinder and why the cutting disc for flex is a must-have in every toolbox.

What is flex?

A flex or angle grinder is a small electric machine that can be used by attaching different discs. The popularity of the angle grinder is due to its versatility.

Cutting disc for flex

Although its name may suggest that it is designed for sanding corners, it is excellent for many other tasks. In addition to cutting, sanding, and polishing, it can also be used to create wall grooves for electrical wiring, for example. The tool is also excellent for cutting and grinding wood, metal, plastic, ceramics, paving stones, concrete, and other materials, with the right choice of discs.

Safety measures are also required when working with angle grinders. The use of protective equipment is recommended, and the workpiece must be properly secured. It is also important to use a handle and wear safety glasses to protect against chips and splinters.

What discs are available for flex?

There are many different types of discs for flex, which can be chosen to suit the task at hand. Some of them are:

Abrasive discs

This is the most used type of disc for flex. They can be used for sanding, cleaning surfaces, cleaning cuts, or preparing metal workpieces before welding. The hardness and smoothness of the abrasive discs are measured by grain size so that the appropriate discs can be selected based on the challenge ahead.

Cutting discs

Cutting discs are thinner and are used to cut metals more accurately. These discs are specially designed to ensure precise and efficient cutting.

Lamellar discs

These discs are used for finishing touches, allowing for finer machining than abrasive discs. They can be used to remove scratches, and damages, and to polish metal surfaces.

Wire Discs

As the name suggests, the main component of a wire disc is the wire, which is attached to a circular disc. There are different sizes and shapes to choose from, depending on exactly what you want to use the disc for. Thinner versions, for example, allow for a more delicate approach, while thicker ones, which have a coarser bristle, allow for very fast and efficient work.

Diamond cutting discs

Diamond, thanks to its hardness, is an excellent material for cutting. These cutting discs have a cutting flange which helps the cutting process itself. As a basic principle, the larger the rim, the more durable the disc. Crucially, diamond-cutting discs can be used for both wet-cutting and dry-cutting jobs. They are versatile, even granite can be worked with these discs.

Polishing pads

Polishing pads can be used to polish the material after the work is finished. They can be used to polish very gently, resulting in a shiny surface. It is important to note that polishing requires the right speed, so not all angle grinders can be used for polishing.

Cutting disc for flex: the most important things to know

Cutting discs can be used for cutting a variety of materials. They are characterised by the fact that they give off heat during the operation, which means that proper cooling must be ensured.

Cutting disc for flex

Cutting discs for flex are available in three versions: standard versions contain 19-22% industrial diamond grit, but there are also so-called economy and premium types. In the economy version, the diamond grit is 10-15%, in the premium version it is 25-30%.

It is essential to know that the design of the segments of the cutting blades depends on the material on which they will be used. If they are used exclusively on that material, they can achieve the highest cutting speed and the longest life. Accordingly, there are, for example, granite cutters, marble cutters, concrete cutters, and brick cutters.

Cutting discs can be used in different ways: some types are wet discs, there are dry discs, and so-called wet-dry discs, which allow mixed-use.

An important concept is segment height, which is something that slowly wears away with use. This means that eventually, it will no longer be suitable to do the cutting work. Equally important is the segment width, which is effectively the thickness of the carrier disc. As a basic rule, the power of the motor should be chosen in proportion to the width of the segment. If it is too thin, the cutting disc will be more easily damaged.

The size of the discs is related to the speed of the angle grinder. Smaller ones are most efficient at higher speeds, up to 10,000 to 15,000 rpm, while for larger ones a lower speed is recommended, for example, 2,800 rpm.

Flanker offers a wide range of industrial tools, tools, and parts. Click here to browse our webcatalogue!

  • Hits: 581

Flat cable that connects

A flat or ribbon cable is a multi-conductor, parallel cable that takes up little space but can still carry a lot of data. What do you need to know about flat cables and their uses? Let’s find out in our new article!

What is a flat cable?

A flat or ribbon cable is a series of wires running in parallel, making it a very efficient transmission tool. It takes up little space and is quite flexible, so it's no wonder it's so popular and widely used. A typical application is in the computer industry: it plays an important role in connecting components. It is commonly used to connect hard disk drives, optical drives and other devices. The flat cable is longer than other types of data cables and has a flat, strip design, so it has a higher data transmission speed.

szalagkabel-02

A flat cable is therefore made up of several strands of wires with a protective sheath around them. The wires are typically not shielded as they do not need to withstand external electrical influences. However, if the data transmission cable has some poles (there are poles in a USB cable or a power cable, for example), these are well-marked with symbols printed on the cable.

What are the advantages of the flat cable?

Flat or ribbon cables have several advantages over other data cables. Let's list the most important ones:

  • Higher data transmission speed: flat cable generally has a higher data transmission speed than other types of data cable.
  • Connecting multiple devices: allows you to connect multiple devices (e.g. hard disk, optical drive, etc.) to the motherboard. This can be an advantage for those who need large data storage capacity.
  • Support for multiple standards: supports ATA, IDE, SCSI and other storage interfaces, which means it can be compatible with a wide range of devices.
  • Cost-effective: Generally cheaper than other types of data cables, which can be an advantage for those looking to save and cut costs.

Overall, the flat cable is an efficient and reliable data cable that is widely used in computers and other electronic devices.

Types of flat cables

There are two main types of flat cables: ATA and SCSI. The ATA (Advanced Technology Attachment) flat cable is one of the most common types and is most commonly used to connect hard disks, optical drives and other data storage devices to the motherboard. There are two versions of ATA flat cables: 40-wire and 80-wire, depending on the speed at which you want to transfer data.

SCSI (Small Computer System Interface) flat cables are typically used to connect larger data storage devices such as hard disks or tape drives and are often used in professional and industrial environments. SCSI flat cables have higher data transfer speeds and can connect more devices than ATA flat cables.

 There are different types of ATA and SCSI flat cables, some with straight and L-shaped connectors, and some longer and shorter versions.

There are different types of flat cables, for example, 14-way (17.91mmx30m), 16-way (20.45mmx30m), 24-way (30.61mmx30m) and so on.

Colour coding

To prevent reverse switching, flat cables are colour coded. This makes it easier to identify the cables, the connector, easier to install and safer to work with. Data cable colour coding varies depending on the type of data cable, but the most commonly used colours are red (power), blue (command), green (data), white (feedback) and yellow (synchronisation).

szalagkabel-03

It is important to note that the colour codes are not always standard and may differ from the colour codes of other manufacturers' cables.

Use of the flat cable

The flat or ribbon cable is used in many sectors, from the electronics industry to the automotive industry. It is used in computing to connect multiple electronic devices, to provide data transfer between the motherboard and, for example, optical drives and sound cards, it is used to improve audio and video recording, sound and image quality, to move and transfer media files, to connect automotive electronics systems, and last but not least, it is used in automated manufacturing processes, on test and measurement equipment and industrial robots.

Flat cables at Flanker

Flanker offers a wide range of flat cable types and packaging. For example, we have 3M 3801/40 flat cable with a circular cross-section, 3M round shielded/shielded twisted flat cable HF659/26 and 3M flat cable 3365/16SF in 30.48m spools. The use of a special ribbon cable connector is recommended for the connection between the flat cables.

  • Hits: 485

Foiling tools

Foiling is an excellent way to quickly transform the appearance of objects, furniture, cars, and glass surfaces, at a low cost. It involves applying a very thin layer of film to the surface, which changes the appearance and even provides a degree of protection against externalities. Let's see what foiling tools to use and what the process looks like step by step!

What surface can you apply foil to?

Foiling is a popular application in industries such as interior design, automotive, and printing. Furniture wrapping is used to give wooden surfaces a new look without having to replace the entire piece of furniture. For example, a wooden cabinet that has lost its shine can be transformed with a new furniture foil coating, creating a fresh and modern look very effectively.

In the automotive industry, foiling is used to change the colour of a car without having to paint it. Vehicle wrapping is a popular option for those who want to personalise their car, hide scratches and dents or even protect it from minor surface damage. Wrapping is an excellent marketing tool: many people use vehicle wrapping to place advertising messages on the car, creating a moving ‘billboard’.

 foiling tools

Foiling is also used on windows and glass surfaces. Just as in cars, glass can be used as an advertising medium, just think of a shop window, in which case the window film is a decorative element. But it's also an excellent choice if you want to restrict the view. Thanks to the window film, the space will not be dark, those inside will be able to see out, but those outside will not be able to see what is happening behind the window. You can apply the window film yourself, especially if the surface area is not too large.

The foiling tools

You will need a few tools to apply the film to the surface. Let's take a look at these and see what you need to know about them.

The foil

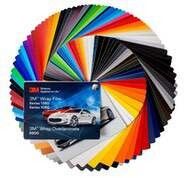
First, you'll need the foil itself. Foils come in different colours and patterns: some are plain, some have patterns, some are transparent and some are opaque. There's a wide range, so everyone can find a film to suit their taste.

Knifeless tape

The films are sold in a variety of forms, but most of them are rolled. This means that we have to cut it first. The knifeless tape technology has been developed to cut the foil without further tools, avoiding the tears and cuts that can occur due to the blade. In the case of knifeless tapes, a very strong tape is used to cut, using carrier tape.

Film cutter

Some knives are specially designed for cutting foil. They can be used to cut foil without crimping, and the safety blade ensures that no accidental cutting occurs.

foiling tools

Measuring tool

As mentioned above, in most cases the foil has to be cut to size. You will need a measuring tool, such as a ruler. It is advisable to measure accurately, otherwise, the result will not be what you expect.

Squeegee for smoothing

Once you've measured and cut the foil to the right size, you're ready to apply it! Apply the foil to the surface with a squeegee. This will help ensure a bubble-free finish. You can also use rollers of different sizes to achieve the same result.

Air-release tool

Despite your best efforts, air bubbles can remain. If you don't want to deal with them, you can use an air-release tool to easily remove the bubbles.

The process of foiling

The first step in applying the film is to clean the surface thoroughly. Care must be taken to remove dirt, grease, and fingerprints. This ensures that the film can adhere properly to the surface. The film is then cut to the size of the surface using the appropriate tools. Avoid the use of tools such as scissors or kitchen knives, which can tear the film if not used correctly.

If you can, don't do it alone, but ask for help.

Once the surface is clean and the film has been cut to size, apply it slowly and carefully, smoothing and pressing it onto the surface. To do this, use a flat object, preferably a trowel or a squeegee. Once the foil has been properly placed, smooth it over thoroughly so that there are no blisters or wrinkles. Take care to remove any air bubbles and make the surface smooth and uniform.

The advantage of foil is that it is not only easy to apply, but also easy to remove. If you want to give the surface a new look because you're bored or the film is damaged or worn, you can simply peel it off. To do this, you need to find a point where you can reach under the film with a pointed object and then pull in the opposite direction to remove the film. Be careful not to damage the base surface.

Using the foil is quick and easy. In some cases, you can do it yourself, for example, to wrap a small piece of furniture or a window, but in most cases, it is best to leave it to a professional with the right skills and tools.

Flanker has everything you need! Have a look at our web catalogue!

  • Hits: 357

Using the cavity vax: fighting rust

Vehicles are typically exposed to a wide range of externalities that can damage and deteriorate them. It is the responsibility of the owner to protect the vehicle from environmental factors such as the weather. One of the biggest enemies of cars is corrosion. In this blog post, we'll look at one possible way of protection, and that is applying cavity vax. What is cavity vax and why is it a good choice? Here are the details!

Why protect against corrosion?

Car manufacturers are striving to offer their customers safer and more comfortable vehicles. They aim to make vehicles last longer, so they protect the body against corrosion in several steps during production.

The body panels are more vulnerable to corrosion because a large proportion of them are made of steel. However, the original corrosion protection can be damaged over time, and it is also possible that elements that have not been properly protected are installed during repairs. In such cases, it is important to restore the original chassis and cavity protection.

 uregvedo-hasznalata-1

What is cavity protection?

Cavity protection is nothing more than guarding the car from corrosion and rust. These are typically the result of environmental influences (e.g. rain, snow, salt) and can cause significant damage to the car’s body. Rust "eats" the material, which over time cracks and holes appear, allowing dirt, water, and air to enter and cause even more damage.

However, by using cavity protection sprays and materials, small gaps, holes, cavities in components, and welded seams can be filled with a specially formulated material that prevents the deterioration process from starting on metal components. Regular use can significantly increase the lifetime of the car, preserve its condition and, as a result, its value does not decrease so rapidly.

Types of cavity protection materials

There are two main types: primers are applied before the paint is applied, but there are also liquids and coatings that are applied to the painted surface. Primers adhere to the surface to prevent oxidation. They are typically colourless or black and can be purchased in the form of cavity vaxes.

There are also cavity protection liquids and powders, the former applied to internal components by brush or spray gun and the latter by paint nozzles. Here's how cavity protection works!

Use of the Cavity Vax

The cavity protection process consists of the following steps: preparation, cleaning, surface treatment, and application of the cavity protection material. The first step in preparation is to cover the surfaces where you do not want the material to get on. This will protect the surfaces from contamination. The full body of the car should then be cleaned. Cleaning and washing is a meticulous process of removing dirt and rust and preparing the surface. For example, if you have a new part in the car, you don't have to remove the rust, but you still have to give it a thorough cleaning.

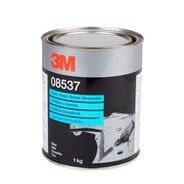
The surface must be prepared before the cavity vax is applied. This can be done using an anti-corrosion primer, which forms a chemical layer on the applied surface and helps prevent rust. Once this has been done, it is time to apply the cavity protector and apply the material. It is advisable to use a brush or a cavity protection spray, which can be used quickly and effectively. The drying time of the cavity vax depends on the type used, but it is usually best to allow 24 hours for complete drying. There are several ways of application, depending on the formulation and the surface to which the material is applied. For example, some applicators can be used to treat hard-to-reach areas.

What are the benefits of cavity vaxes?

Cavity protection is a method of preventing corrosion. Let's look at the benefits and why you should not skip this step!

Chassis protection, corrosion protection, and cavity protection can help to preserve the condition of your vehicle. Treatments can significantly increase the lifetime of your car. They protect against the damaging effects that promote rust and the spread of rust. Because the condition of the car can be preserved, repair costs and depreciation can be reduced. Not to mention the fact that a corroded surface is not very aesthetically pleasing, but if you protect against it, you can keep your bodywork looking good for a long time.

The adequacy of cavity protection should be checked regularly and, if necessary, maintenance should be carried out. Visual inspection from time to time will help to spot any damage and corroded areas in time. The best time to check the cavity protection is during the car's normal maintenance period when the car is in the workshop. During the visual inspection, the chassis should be inspected, as well as the doors, fenders, bumpers, and window frames. It is worth paying particular attention to corrosion and possible damage.

If any damage is noticed during the inspection, it should be rectified immediately, as these usually lead to corroded areas and cracks which can lead to further corrosion damage. It is advisable to seek professional help if repairs are required. He or she will replace, repair, and clean the damaged parts and also ensure proper cavity protection.

Looking for automotive supplies? Have a look around Flanker's webshop and choose from our range of products!

  • Hits: 383

© All Rights Reserved – Flanker Plusz Kft. | Site by Meraki